Easy No-Bake Chocolate Oreo Cheesecake: A Dessert Delight!
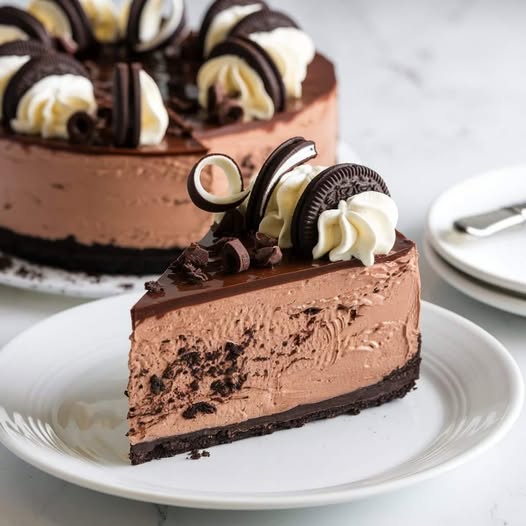
Craving a dessert that looks impressive but is easy to make? This no-bake Chocolate Oreo Cheesecake is the ultimate treat for chocolate and Oreo lovers. With layers of creamy filling, rich ganache, and a crunchy Oreo crust, it’s perfect for any occasion!
Ingredients
For the Crust:
- 2 cups (about 24 pieces) Oreo cookie crumbs
- 5 tablespoons (70g) melted butter
For the Cheesecake Filling:
- 16 oz (450g) cream cheese, softened
- 1 cup (125g) powdered sugar
- 1 teaspoon vanilla extract
- 1 cup (240ml) heavy cream, whipped to stiff peaks
- 1 cup (150g) melted semi-sweet chocolate, cooled
- 1 cup (100g) crushed Oreos
For the Ganache:
- ½ cup (120ml) heavy cream
- ½ cup (100g) semi-sweet chocolate, finely chopped
Optional Toppings:
- Whipped cream
- Oreo cookies
- Chocolate curls

Instructions
Step 1: Make the Oreo Crust
- Blend Oreo cookies into fine crumbs using a food processor or crush in a zip-top bag with a rolling pin.
- Mix the crumbs with melted butter until evenly coated.
- Press the mixture into the bottom of a 9-inch springform pan. Chill in the refrigerator for 20–30 minutes.
Step 2: Prepare the Filling
- Beat softened cream cheese and powdered sugar in a mixing bowl until smooth and creamy.
- Add melted chocolate and vanilla extract, and mix until combined.
- Gently fold in the whipped cream until light and fluffy.
- Stir in the crushed Oreos for added texture.
Step 3: Assemble the Cheesecake
- Spread the filling evenly over the chilled crust. Smooth the top with a spatula.
- Cover the pan with plastic wrap and refrigerate for at least 6 hours, or overnight for best results.
Step 4: Make the Ganache
- Heat heavy cream in a small saucepan over medium heat until it begins to steam.
- Pour the hot cream over the chopped chocolate and let sit for 2 minutes. Stir until smooth.
- Allow the ganache to cool slightly before pouring over the cheesecake. Spread evenly.
Step 5: Decorate and Serve
- Garnish with whipped cream, Oreo cookies, and chocolate curls for a stunning finish.
- Slice and serve chilled.
Why You’ll Love This Cheesecake
- No Baking Required: Perfect for when you want a dessert without the hassle of an oven.
- Rich and Decadent: A smooth chocolate filling paired with a crunchy crust creates a delightful contrast.
- Customizable: Switch up the toppings with caramel drizzle, berries, or nuts.
Helpful Tips
- Chill Time Is Essential: Let the cheesecake set for several hours to achieve the perfect texture.
- Use High-Quality Chocolate: For a richer flavor, choose premium chocolate for the ganache and filling.
- Smooth Crust: Press the crust firmly to ensure it holds together when slicing.
Storage Instructions
- Refrigerate: Store in an airtight container in the fridge for up to 5 days.
- Freeze: Wrap individual slices in plastic wrap and store in the freezer for up to 2 months. Thaw in the fridge before serving.